
Adding personality to your outdoor space doesn’t require a big budget or professional skills. DIY outdoor garden art lets you transform everyday materials into eye-catching features that reflect your style and make your garden uniquely yours. Whether you’re working with a sprawling backyard in Eltham or a compact courtyard in Melbourne’s inner suburbs, these creative projects will help you craft a garden that tells your story.
What Is DIY Outdoor Garden Art?
Garden art encompasses any decorative or functional piece that adds visual interest to your outdoor space. Unlike mass-produced garden décor, DIY garden art carries personal meaning and creative expression. It might be a painted rock tucked among your natives, a mosaic stepping stone leading to your entertaining area, or wind chimes crafted from driftwood collected on a coastal walk.
The beauty of handmade garden art lies in its imperfection. These pieces don’t need to look factory-finished—their handcrafted character is precisely what makes them special. Garden art can serve purely decorative purposes or combine beauty with function, like a bird feeder that doubles as a sculptural focal point.
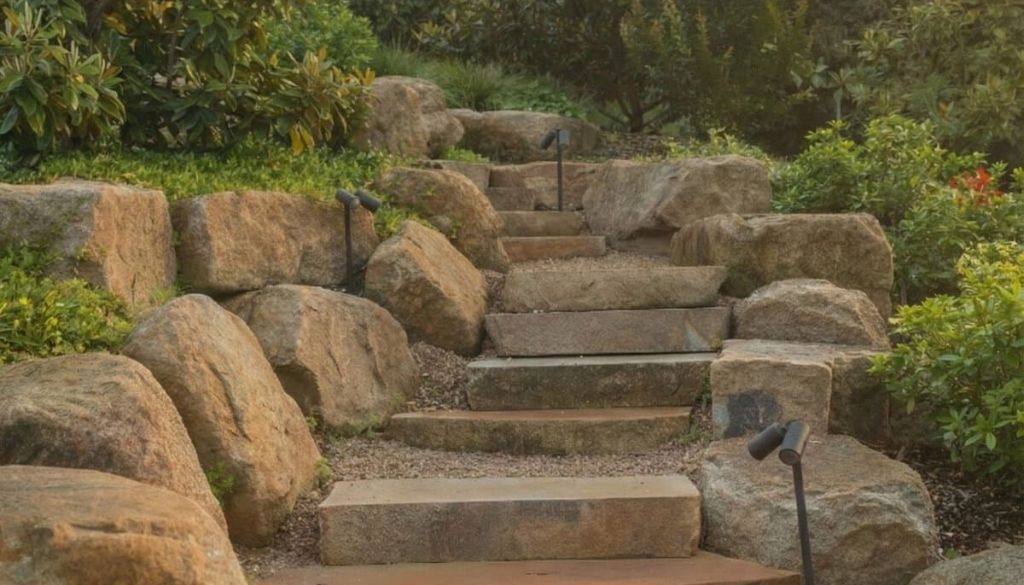
What sets DIY garden art apart from store-bought alternatives is the story behind each piece. That mosaic table was made during a rainy weekend with the kids. Those painted rocks mark the herbs you planted last spring. Every piece carries memory and meaning that no catalogue purchase can replicate. Consider placing your DIY art pieces near trees for maximum impact—check out these landscaping ideas around trees for creative placement inspiration.
Why Create Your Own Garden Art?
There’s something deeply satisfying about walking through your garden and seeing pieces you’ve made with your own hands. Beyond the creative fulfilment, DIY garden art offers practical benefits that purchased décor simply can’t match.
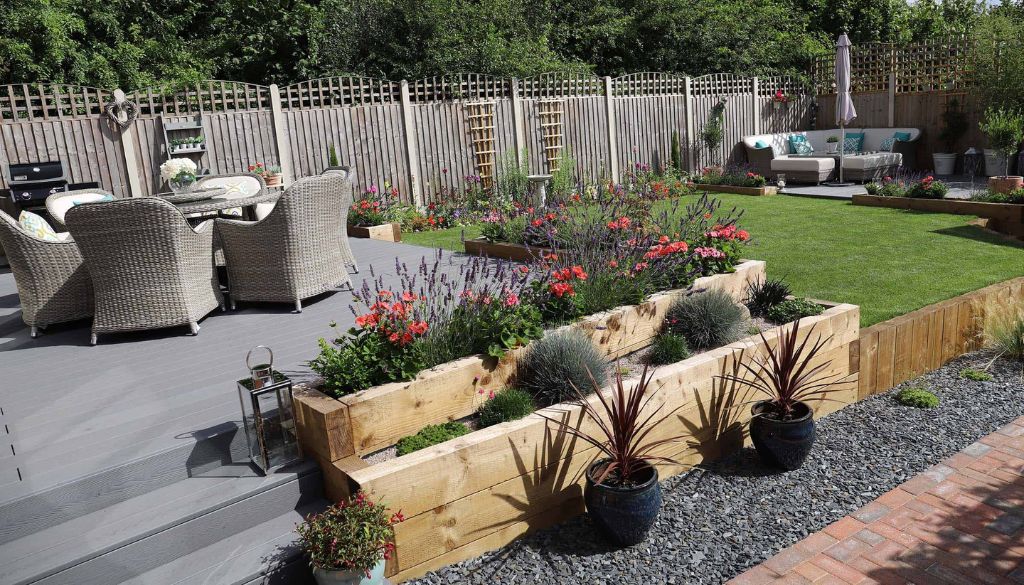
Personalisation sits at the heart of the DIY approach. You choose colours that complement your plantings, sizes that suit your space, and styles that reflect your taste—whether that’s rustic Australian naturalism or something more contemporary. Your DIY garden art can complement any style, especially when you understand contemporary garden design principles that balance sculptural elements with natural plantings.
Cost savings make DIY garden art accessible to everyone. Many projects use materials you already have at home or can source for free. That broken terracotta pot becomes a fairy garden, those wine bottles transform into elegant garden edging, and those smooth stones from your last beach trip turn into painted garden markers.
Sustainability appeals to environmentally conscious gardeners. Upcycling household items and salvaged materials keeps them out of landfill while giving your garden character. It’s a small but meaningful way to garden more responsibly.
Materials Commonly Used in DIY Garden Art
Before starting any project, gather materials that will withstand Melbourne’s variable weather—from scorching summer days to wet winters. The best DIY garden art materials are durable, weatherproof (or can be sealed), and often free.
Recycled household items offer endless possibilities. Tin cans, glass bottles, old cutlery, and broken ceramics all have creative potential. Look at items destined for the bin with fresh eyes.
Natural materials blend seamlessly into garden settings. Driftwood, river stones, fallen branches, and salvaged timber bring organic texture and age beautifully over time.
Leftover building materials from home projects work wonderfully. Tiles, pavers, bricks, copper pipe offcuts, and timber scraps can all become garden features.
Garden and hardware basics round out your supplies. Exterior paints, weatherproof sealers, strong adhesives, and basic tools will see you through most projects.
Easy DIY Outdoor Garden Art Projects
These projects suit various skill levels and budgets. Start with something simple and build your confidence before tackling more ambitious pieces.
Painted Rock Garden Art
Painted rocks are the perfect entry point for garden art beginners. Collect smooth river stones or purchase them from a landscape supplier, then transform them with exterior acrylic paints.
Create garden markers labelling your herbs and vegetables, paint cheerful ladybugs to nestle among ground covers, or design a family of decorative stones in colours that complement your plantings. Seal finished pieces with exterior varnish to protect your artwork from the elements.
Upcycled Tin Can Lanterns
Empty tin cans become atmospheric garden lanterns with minimal effort. Clean the cans thoroughly, fill them with water and freeze overnight (this prevents denting), then use a hammer and nail to punch patterns into the sides. Simple designs like stars, spirals, or random dots work best.
Remove the ice, spray paint the exterior in your chosen colour, and place a tea light or LED candle inside. Group several lanterns at different heights for impact along pathways or on outdoor tables. Garden art looks stunning when placed along pathways—explore creative garden path designs for inspiration on where to display your handmade pieces.
Mosaic Garden Stepping Stones
Mosaic stepping stones combine function with artistry. You’ll need a stepping stone mould (or use an old cake tin), concrete mix, and mosaic materials—broken tiles, glass beads, shells, or smooth pebbles.
Pour concrete into your mould, let it firm slightly, then press your mosaic pieces into the surface. Work quickly before the concrete sets. Allow several days to cure completely before placing in your garden. These personalised stepping stones create a pathway that’s genuinely one of a kind.
Recycled Glass Bottle Garden Edging
Wine bottles and beer bottles make surprisingly elegant garden borders. Dig a narrow trench along your garden bed edge, then bury bottles upside down with the bases facing upward. The glass catches light beautifully, especially with bottles in various colours. Before placing your garden art, learn the secrets of garden planning and design to ensure your creations enhance rather than overwhelm your outdoor space.
Blue, green, and amber bottles create a particularly striking effect when grouped together. This project costs virtually nothing if you save bottles over time, and the result looks far more sophisticated than plastic edging.
DIY Wind Chimes and Sound Art
Sound adds another dimension to garden enjoyment. Create wind chimes from driftwood pieces hung with fishing line, old keys suspended from a branch, or metal offcuts that ring when the breeze catches them.
Position sound art where it will catch prevailing winds without overwhelming your space. Near seating areas, the gentle sounds become part of the relaxation experience.
Garden Art Placement Tips
Where you position garden art matters as much as the pieces themselves. Thoughtful placement creates cohesion rather than clutter.
Create focal points by positioning statement pieces where the eye naturally travels—at the end of pathways, in garden bed centres, or visible from indoor living areas. A single well-placed piece has more impact than many scattered randomly.
Use height and layers to add dimension. Place art at ground level, eye level, and overhead. A painted pot on the ground, a hanging feature at eye height, and wind chimes above create visual interest throughout the vertical space.
Integrate art with plantings rather than isolating pieces in bare areas. Garden art should complement your plants, not compete with them. Tuck smaller pieces among foliage where they’ll surprise and delight as visitors explore your garden.
Matching Garden Art to Your Style
Your garden art should feel like a natural extension of your overall garden design. Consider the character you’re creating.
Rustic and natural styles suit Australian native gardens beautifully. Driftwood sculptures, stone arrangements, and weathered metal pieces complement indigenous plantings and naturalistic designs.
Whimsical and playful approaches work well for family gardens. Bright colours, quirky characters, and interactive pieces engage children and add joy.
Modern and minimal gardens call for restraint. Choose one or two sculptural pieces with clean lines rather than collections of smaller items.
Common DIY Garden Art Mistakes to Avoid
Learning from others’ missteps saves time and materials. Watch out for these frequent errors.
Overcrowding diminishes impact. Too many pieces competing for attention creates visual chaos. Edit ruthlessly—remove items that don’t contribute to your overall vision. Sometimes less truly is more.
Poor weatherproofing leads to disappointment when pieces deteriorate after one season. Always use exterior-rated paints, sealers, and adhesives designed for outdoor conditions.
Ignoring scale throws off proportions. A tiny ornament disappears in a large garden bed, while an oversized piece overwhelms a small courtyard. Consider the scale of surrounding plants and structures when sizing your projects. Don’t forget overlooked spaces when displaying your garden art—discover landscaping ideas for side yards where your DIY creations can truly shine.
Using unsafe materials creates hazards. Avoid items that might leach chemicals into soil near edibles, sharp edges at child height, or unstable constructions that could topple.
Maintaining DIY Outdoor Garden Art
Outdoor conditions take their toll on garden art. A little maintenance extends the life of your creations significantly.
Seal painted surfaces with exterior-grade varnish or polyurethane before installation. Reapply sealant annually or when you notice wear. Check metal pieces for rust and treat with rust converter if needed. Clean mosaic surfaces with a soft brush to prevent algae buildup in grout lines.
Accept that some weathering adds character. Garden art needn’t look pristine—a little patina often improves the aesthetic.
Frequently Asked Questions
What materials are best for DIY outdoor garden art?
The best materials withstand sun, rain, and temperature changes without deteriorating quickly. Stone, concrete, treated timber, exterior-grade metals, and glass all perform well outdoors. Terracotta works in sheltered spots but may crack in frost-prone areas. Whatever materials you choose, apply appropriate sealers and exterior-rated paints to extend their lifespan significantly.
How do you weatherproof DIY garden art?
Start with exterior-grade paints and finishes designed for outdoor use. Once your piece is complete, apply two to three coats of exterior polyurethane or marine varnish, allowing proper drying time between coats. For metal pieces, use rust-inhibiting primer before painting. Reapply sealant annually or whenever you notice the finish wearing thin, particularly on horizontal surfaces that cop the most weather.
Is recycled garden art safe outdoors?
Most recycled materials are perfectly safe for outdoor use with a few precautions. Avoid items that may have held toxic chemicals, and don’t use treated timber or questionable materials near vegetable gardens where they could leach into soil. Check glass and metal pieces for sharp edges, especially in gardens where children play. When in doubt, seal surfaces completely to prevent any potential contamination.
Can DIY garden art attract wildlife?
Absolutely—and you can design pieces specifically for this purpose. Bird feeders, shallow water dishes, and insect hotels all double as garden art while supporting local wildlife. Avoid reflective surfaces that might confuse birds, and position wildlife-friendly art away from areas where pets might disturb visiting creatures. Native plantings combined with thoughtful garden art create habitats that attract everything from honeyeaters to beneficial insects.
How do I make garden art on a budget?
The most budget-friendly garden art uses materials you already have or can source for free. Save glass bottles, tin cans, and broken ceramics instead of binning them. Collect driftwood, stones, and fallen branches on walks. Check local buy-swap-sell groups for free tiles, pavers, and timber offcuts. The only purchases you’ll typically need are exterior paint, sealer, and basic adhesives—and these go a long way across multiple projects.
Ready to Transform Your Garden?
DIY garden art is just one element of creating an outdoor space you’ll love. For homeowners across Eltham and Melbourne’s surrounding suburbs who want to take their garden to the next level, professional landscape design brings everything together—from plant selection and hardscaping to those perfect spots where your handmade art will shine.
John French Landscape Design has been creating beautiful residential landscapes since 1981, helping Melbourne homeowners craft outdoor spaces that balance sustainability, functionality, and personal style. Whether you’re planning a complete garden transformation or seeking expert advice on enhancing your existing space, contact John French Landscape Design on 0419 725 344 or visit johnfrenchlandscapes.com.au to start the conversation.
Your garden is waiting to become something extraordinary—one creative project at a time.