Written by Admin and published on https://www.goodhousekeeping.com/.
Growing your own vegetables is both fun and rewarding. All you really need to get started is some decent soil and a few plants. But to be a really successful vegetable gardener — and to do it organically — you’ll need to understand what it takes to keep your plants healthy and vigorous. Here are the basics.
“Feed the soil” is like a mantra for organic gardeners, and with good reason. In conventional chemical agriculture, crop plants are indeed “fed” directly using synthetic fertilizers.
When taken to extremes, this kind of chemical force-feeding can gradually impoverish the soil. And turn it from a rich entity teeming with microorganisms insects and other life forms, into an inert growing medium that exists mainly to anchor the plants’ roots, and that provides little or no nutrition in its own right.
Everything You Need to Know About Starting a Vegetable Garden
From getting fertile soil to timing your crops carefully.
One hundred pounds of tomatoes from just 100 square feet. Twenty pounds of carrots from 24 square feet. Delicious vegetables from a 15-by-20-foot plot. Believe it or not, it’s not impossible to grow your own vegetable garden with yields of this nature. All that’s required is some patience and smart tactics to get the most out of your garden space. Follow these tips and tricks to plan the vegetable gardening of your dreams.
Develop a practical plan.
The first step to growing a healthy garden is marking off exactly where you want the beds to go. Consider the size, shape, and location of your garden to figure out the best set-up for you. Keep in mind that it can always be changed over time if necessary.
Plant in raised beds with rich soil.
Expert gardeners agree that building up the soil is the single most important factor in pumping up yields. A deep, organically rich soil encourages the growth of healthy, extensive roots able to reach more nutrients and water. The result: extra-lush, extra-productive growth above ground.
The fastest way to get that deep layer of fertile soil is to make raised beds. Raised beds yield up to four times more than the same amount of space planted in rows. That’s due not only to their loose, fertile soil but also to efficient spacing. By using less space for paths, you have more room to grow plants.
Raised beds save you time, too. One researcher tracked the time it took to plant and maintain a 30-by-30-foot garden planted in beds, and found that he needed to spend just 27 hours in the garden from mid-May to mid-October. Yet he was able to harvest 1,900 pounds of fresh vegetables. That’s a year’s supply of food for three people from about three total days of work!
How do raised beds save so much time? Plants grow close enough together to crowd out competing weeds so you spend less time weeding. The close spacing also makes watering and harvesting more efficient.
Round out the soil in your beds.
The shape of your beds can make a difference, too. Raised beds become more space-efficient by gently rounding the soil to form an arc. A rounded bed that is 5 feet wide across its base, for instance, could give you a 6-foot-wide arc above it. That foot might not seem like much, but multiply it by the length of your bed and you’ll see that it can make a big difference in total planting area.
In a 20-foot-long bed, for example, mounding the soil in the middle increases your total planting area from 100 to 120 square feet. That’s a 20% gain in planting space in a bed that takes up the same amount of ground space. Lettuce, spinach, and other greens are perfect crops for planting on the edges of a rounded bed.
Consider worm castings.
Worm castings, a.k.a. poop, are a natural fertilizer that can stimulate plant growth. It also helps soil retain water, which is key for a healthy vegetable garden. Work in the worm castings as you turn and break up clumps of soil. If you’re not seeing a lot of earthworms in your soil already, be generous with the castings. Your local garden store can offer guidance on how much to add.
Aim to plant crops in triangles rather than rows.
To get the maximum yields from each bed, pay attention to how you arrange your plants. Avoid planting in square patterns or rows. Instead, stagger the plants by planting in triangles. By doing so, you can fit 10 to 14% more plants in each bed.
Just be careful not to space your plants too tightly. Some plants won’t reach their full size — or yield — when crowded. For instance, when one researcher increased the spacing between romaine lettuces from 8 to 10 inches, the harvest weight per plant doubled. (Remember that weight yield per square foot is more important than the number of plants per square foot.)
Overly tight spacing can also stress plants, making them more susceptible to diseases and insect attack.
Try climbing plants to make the most of space.
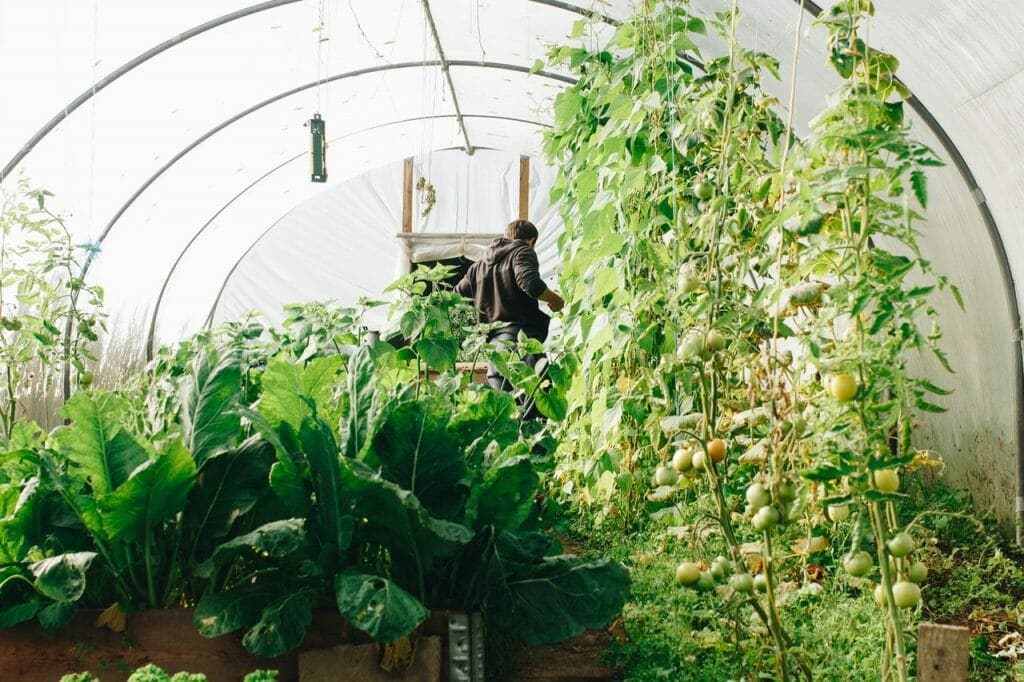
No matter how small your garden, you can grow more by going vertical. Grow space-hungry vining crops—such as tomatoes, pole beans, peas, squash, melons, cukes, and so on—straight up, supported by trellises, fences, cages, or stakes.
Growing vegetables vertically also saves time. Harvest and maintenance go faster because you can see exactly where the fruits are. Fungal diseases are also less likely to affect upward-bound plants s thanks to the improved air circulation around the foliage.
Try growing vining crops on trellises along one side of raised beds, using sturdy end posts with nylon mesh netting or string in between to provide a climbing surface. Tie the growing vines to the trellis. But don’t worry about securing heavy fruits. Even squash and melons will develop thicker stems for support.
Choose the right pairings.
Interplanting compatible crops saves space, too. Consider the classic Native American combination, the “three sisters:” corn, beans, and squash. Sturdy cornstalks support the pole beans, while squash grows freely on the ground below, shading out competing weeds.
Other compatible combinations include tomatoes, basil, and onions; leaf lettuce and peas or brassicas; carrots, onions, and radishes; and beets and celery.
Know how to time your crops well.
Succession planting allows you to grow more than one crop in a given space over the course of a growing season. That way, many gardeners can harvest three or even four crops from a single area. For instance, follow an early crop of leaf lettuce with a fast-maturing corn, and then grow more greens or overwintered garlic — all within a single growing season. To get the most from your succession plantings:
- Use transplants. A transplant is already a month or so old when you plant it, and matures that much faster than a seed sown directly in the garden.
- Choose fast-maturing varieties.
- Replenish the soil with a ¼-to-½-inch layer of compost (about 2 cubic feet per 100 square feet) each time you replant. Work it into the top few inches of soil.
Covering the beds to extend your season.
Adding a few weeks to each end of the growing season can buy you enough time to grow yet another succession crop — say a planting of leaf lettuce, kale, or turnips — or to harvest more end-of-the-season tomatoes.
To get those extra weeks of production, you need to keep the air around your plants warm (even when the weather is cold) by using mulches, cloches, row covers, or cold frames.
Or give heat-loving crops (such as melons, peppers, and eggplants) an extra-early start in the spring by using two “blankets” — one to warm the air and one to warm the soil. About six to eight weeks before the last frost date, preheat cold soil by covering it with either infrared-transmitting (IRT) mulch or black plastic, which will absorb heat.
Then, cover the bed with a slitted, clear plastic tunnel. When the soil temperature reaches 65 to 70 degrees Farenheit, set out plants and cover the black plastic mulch with straw to keep it from trapping too much heat. Remove the clear plastic tunnel when the air temperature warms and all danger of frost has passed. Install it again at the end of the season when temperatures cool.
But remember the cons of mulching the seed beds with straw.
One downside of straw mulch is that it provides a hide-out for slugs during the day. Suze Bono, an accomplished farmer, likes to hand pick them off at night with a headlamp and a tub of soapy water to toss them into. Companion planting with alliums, which naturally ward off slugs, is also a good idea.
Original post here https://www.goodhousekeeping.com/home/gardening/a20706435/vegetable-garden-tips/.


