Written by Robert Robillard and published on https://www.aconcordcarpenter.com/
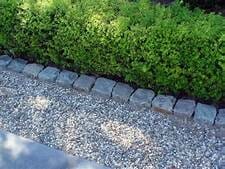
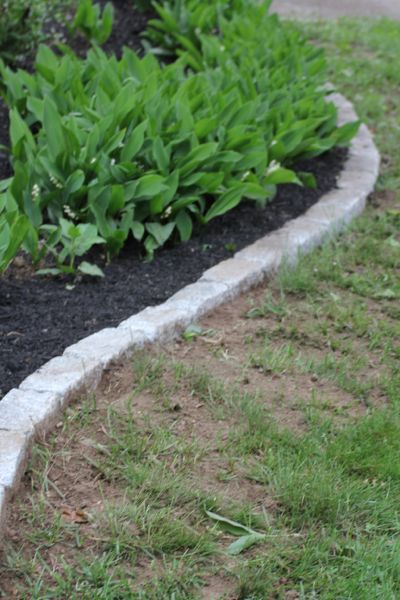
Gardens, walkways, driveways, and patios look more formal when edging is used to define the boundaries. Cobblestones–small round or square stones–work well as edging when a more natural look is desired compared to other edging options such as brick. Use cobblestone edging to soften the harsh appearance of asphalt driveways, to border a flagstone, brick, or gravel walkway, or to separate flower beds from lawns. Edging helps prevent the spread of grass and weeds and serves as a mowing edge to protect landscape plants from lawnmowers and weed trimmers.
How To Install Cobblestone Edging
Cobble Stone Garden Edging and Borders
I live in the Metro-Boston area where older streets are still paved in granite cobblestones and setts. Cobbles stones make great edging material for gardens, raised beds, pathways and even driveways. Cobblestone edging transforms a landscaping project into a neat and organized looking finished product. In this article we will show you how to install cobblestone edging.
Cobblestone Curb Appeal Video
Curb Appeal Edging
Garden edging provides a formal definition to garden beds, pathways and other area where you wan a definitive border or edge. A simple cobblestone edging provides an easy boundary to plant against, while keeping roots in place.
With cobblestones, the view from the street or, curb appeal, creates a landscape that looks neat, organized and professionally installed.
Installing cobblestones does not need to be a difficult task, and is a project that can be accomplished in a relatively short period of time
Locations For Cobble Stones
• Planting beds
• Herb gardens]
• Raised flower or vegetable beds
• Walkways
• Patios
• Ponds
• Separate flower beds
• Foundation plantings
• Driveways
• Prevent spread of grass
• Protect landscape from mowers and trimmers
Cobblestone Sizes
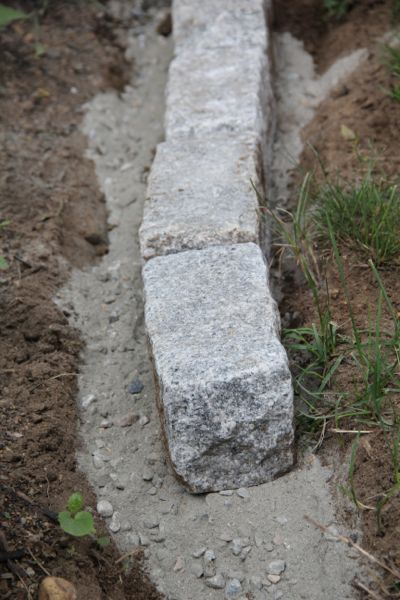
New granite cobbles are available in 6″, 7″, 8″ and 4″ x 4″.
The cobbles used on our project are called “Belgian blocks.” Belgin blocks are granite and rock pitched to give an antique or tumbled appearance. Belgian blocks are available in 9″ x 5″ x 4″, and in jumbo size, which is approximately 10 1/2″ x 7 1/2″ x 4″.
Planning
The first step in any landscaping edging or border project is to design, measure and lay out your project. You can layout-curved beds and the edging with string, rope or a garden hose and then mark them with orange spray-paint.
Straight beds can be laid our straight piece of lumber to help visualize the project and then marked with orange paint.
Prepare the Base
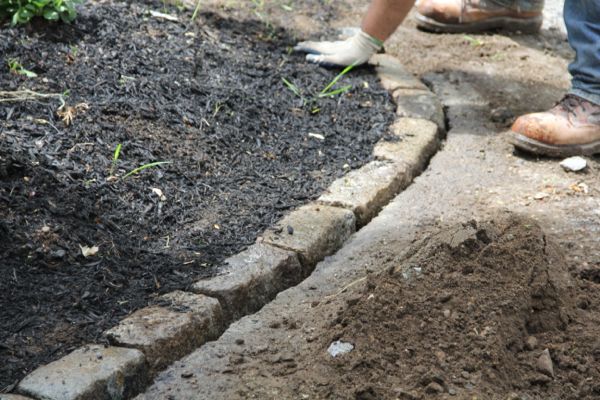
- Once the edge of your cobbles is established its time to excavate with a shovel. Dig a trench following your cobble edge line.
Dig a uniform trench to help ensure your stone edge will be laid at the same height and in a straight line. On straight runs, install a string line for accuracy. - Remove the earth below grade where you will be installing your cobbles allowing for at least 2″ of gravel or stone dust, or concrete and mortar mix plus one third of the cobble below grade.
- I recommend using a dry mix of mortar mix.
Install the Cobbles
- Position cobbles on your base material.
- Position the cobbles tightly to each other. A mallet and level as needed to set the cobbles into the base material.
- Adjust the cobblestone to the top of the front line string, and place into the dry mortar mx, butting it up tightly against the end of the trench and the walkway, garden bed or driveway.
- Tap it down with a mallet to set it into the mortar mix.
- Check it for level with a level, then add or remove mortar as needed so the top of the cobblestone is level.
- Push the stones against the end of the trench and against each other. Add the next four cobblestones in this manner, using your sight to judge for level.
- Install five cobblestones at a time and check for level across them.
- Add or remove mortar to achieve level edging
- Install cobbles end to end and cut the first and last stone as needed. If you do not have access to a stone saw then spread the stones as needed to avoid cutting, or use a cold chisel and hammer.
TIP – It may be desirable to leave part of the cobblestones protruding above ground level, such as when using them, as edging for flowerbeds, but at least 1/3 of the cobblestones should be buried to prevent them from shifting.
Cold Chisel Method:
A simple way to cut cobblestones is to use a cold chisel and 3 pound hammer. Score a cobblestone with a cold chisel and hammer all the way around the stone to break it into a smaller piece, set it in place as you did with the previous cobblestones.
Set the Stones in Mortar
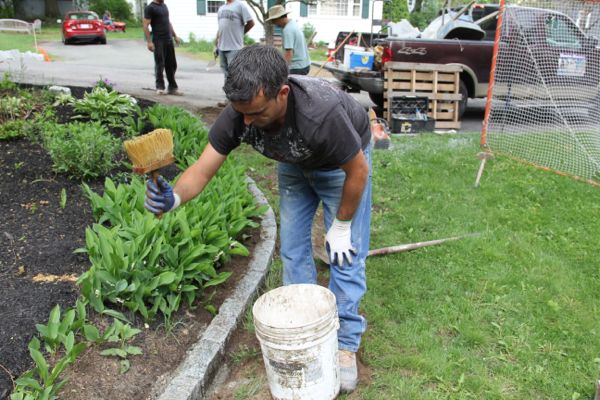
To set the cobblestones in thee mortar you need to add water. The best way to do this is to use a bristle brush and a bucked of water to wet the mortar. Wet the mortar so its saturated and then install a layer loam to hide the mortar.
Original post here https://www.aconcordcarpenter.com/how-to-install-cobblestone-edging.html/.